In my last post I discussed the basics of what kombucha is, and benefits of brewing your own. Here, I’ll tell you how to make it yourself from start to finish.
First, you’ll need to acquire a SCOBY, a glass or ceramic crock (I have a 2 gallon glass crock, 1 gallon is great to start) a small funnel, at least 4 self-capping bottles, a piece of clean cloth to cover the entire top of the crock, and a rubber band to hold it in place. You will also need tea, sugar, and kombucha starter (kombucha that’s already fully brewed, you can just buy a bottle and use some of it to start your brew.) The proportions I’ll use below are based off of a 1 gallon batch, but you can adjust ingredients to your batch size.
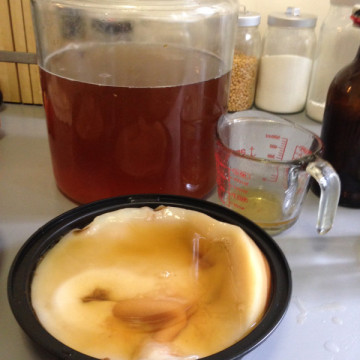
Tip: every batch of kombucha you brew will give you another SCOBY. Give them away to friends! They are supposedly edible, but I’ve never been brave enough to try cooking with it. Your dog will probably enjoy it.
The first step: primary fermentation, the initial kombucha brew phase
Kombucha is a fermented tea beverage, so the very first thing we need to do is brew some tea. The brew we’re going to make will be extra strong, because it is going to get diluted with water. Hot water will kill your SCOBY, so brewing a smaller amount of extra strong tea and then diluting it to cool it down will still give you great kombucha while keeping your SCOBY alive.
The three types of teas you can use in primary fermentation are black, green, and white. Don’t use herbal or floral teas as they will hurt your SCOBY. I recommend trying a black tea at first, as black teas are recommended for the most robust kombuchas. Then on your next brew, you can make blends of black, green, and white tea and find combinations which you like best.
1. For a one gallon brew, boil about 4 ¼ c water (enough to fill a 34 oz French press.)
2. Steep with either 6 tea bags or 6 tablespoons of loose leaf tea, for 15-20 minutes, making sure to stir and press the tea to squeeze out all of the nutrients in the tea.
3. Then, pour the hot tea into your brewing vessel. Add the 1 cup of sugar, and stir until it dissolves.
4. Then, add another 12 cups of cold water to the hot tea. This will bring the temperature down, and make it a suitable environment for your SCOBY to live in. During fermentation the SCOBY will slowly eat the sugar you dissolved a minute ago.
5. Stick your finger in the liquid to make sure its cool, then put in 1 cup of the finished and bottled kombucha you bought, and stir. Add the SCOBY.
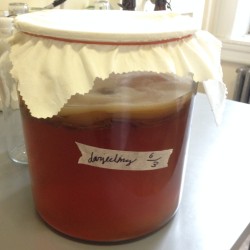
6. Cover the top of the crock with your clean cloth and secure with a rubber band. Put somewhere cool and out of direct sunlight, and wait. I let mine brew for around 10 days. The longer you brew, the stronger and more acidic it will be. If you let it go for too long, it will turn into vinegar, so make sure to date your kombucha so you don’t forget, like so:
Do not uncover the jar for any reason, or you can introduce foreign unwanted bacteria in, which will grow mold. Also watch out for fruit flies. A securely covered vessel will keep these invaders out.
Secondary Fermentation
You can test your brew between 7-10 days to see where it’s at. If you want it stronger, wait longer. When you reach your chosen flavor, you can start bottling. This is the fun part: you can flavor your kombucha however you want to. I recommend using fresh fruits in the secondary fermentation because they will aid in carbonating your brew.
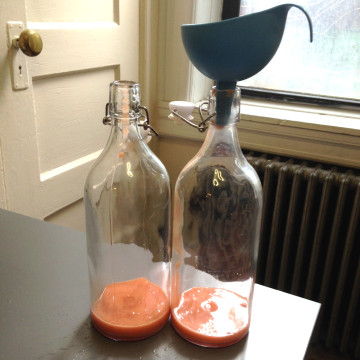
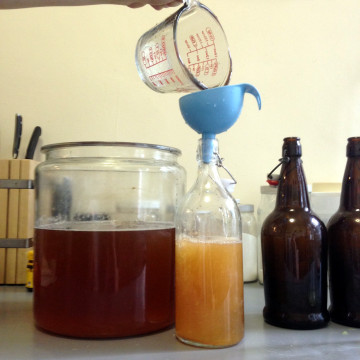
The best way to get the most flavor is to juice or puree your fruit. You can also make infusions out of herbs to use on their own or combine with a fruit flavoring. Some of my favorite combinations that I’ve done are lemon ginger, orange rose, and blueberry lavender. For the lemon ginger, I juiced fresh lemons and grated ginger straight into the bottle. For the orange rose, I juiced oranges and made an infusion out of rose petals, and poured both in. For the blueberry lavender, I pureed blueberries in a blender and made a lavender infusion, added the infusion into the blueberries and re-blended. You can add as little or as much flavoring as you like, but don’t go too crazy. I only add about ¼- ½ cup of flavoring per bottle. Add the flavoring first using a funnel. I use a measuring cup just as a means to help pour into the bottles:
Then, add in your kombucha brew.
Once you’ve poured your flavors and brew in, cap your bottles, and store them out of sunlight for about 3 days, which should allow them enough time to carbonate. Flat kombucha is a huge bummer and if you don’t do this step, you won’t have any bubbles in your brew. But after 3 days, you put them in the fridge, and enjoy at your leisure. Happy kombucha making!
Also by Maddy: Maple Pecan Granola Recipe
Get more like this–sign up for our newsletter for exclusive inspirational content!
__
Photo: Maddy Strassler

