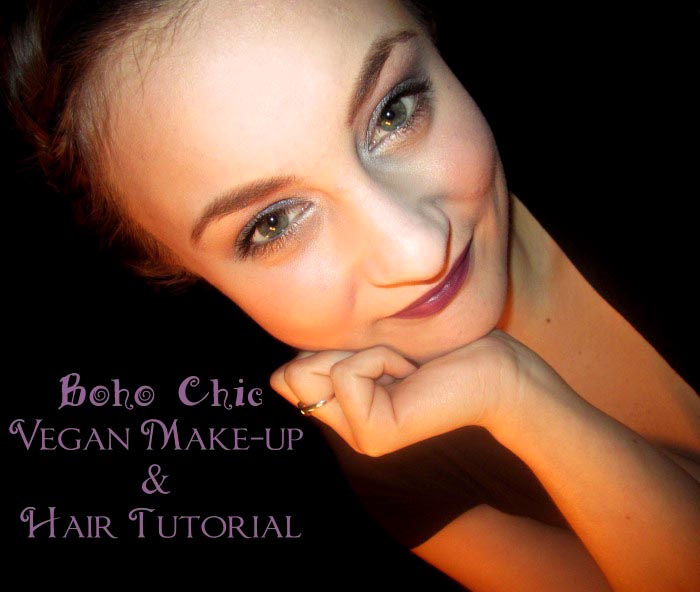
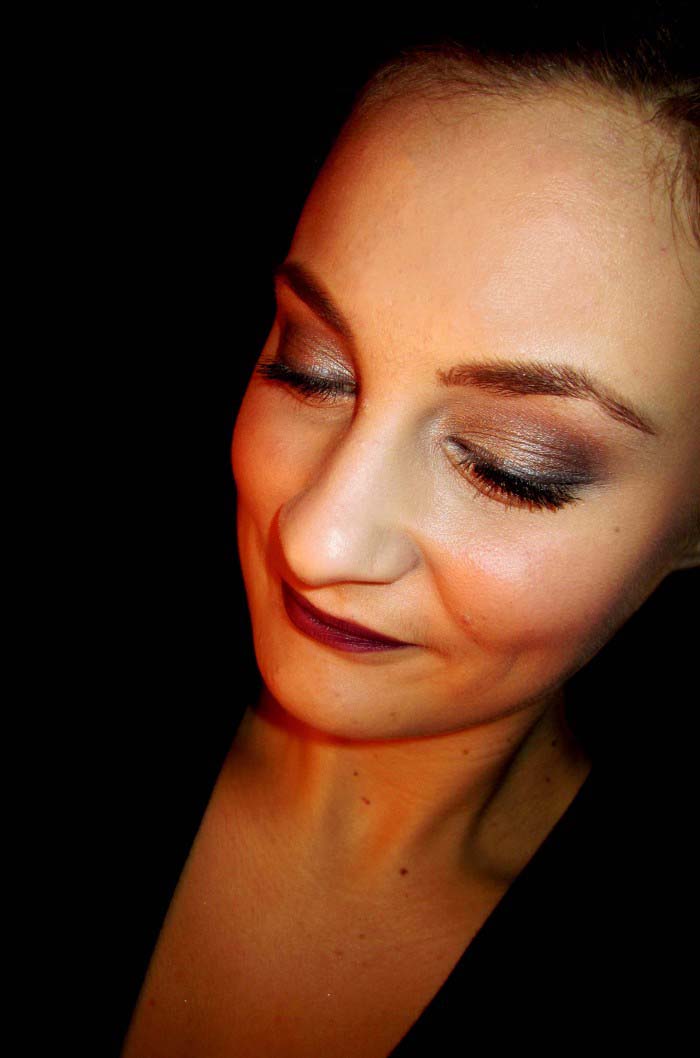
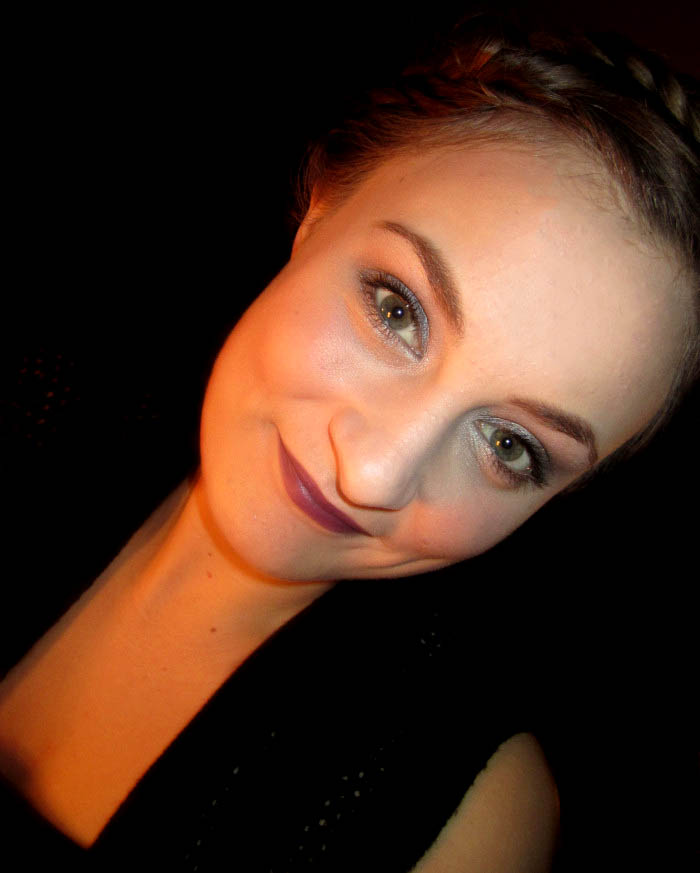
Bohemian style has risen in popularity within the beauty and fashion industry over the past few seasons, and the style outlook for 2015 shows it holding strong! Intricate, yet delicate hairstyles paired with soft, feminine makeup create the perfect boho chic look. If you’re looking for a way to incorporate a little boho style into your everyday look, check out my shimmery chic vegan makeup and fishtail crown braid tutorial!
The Products:
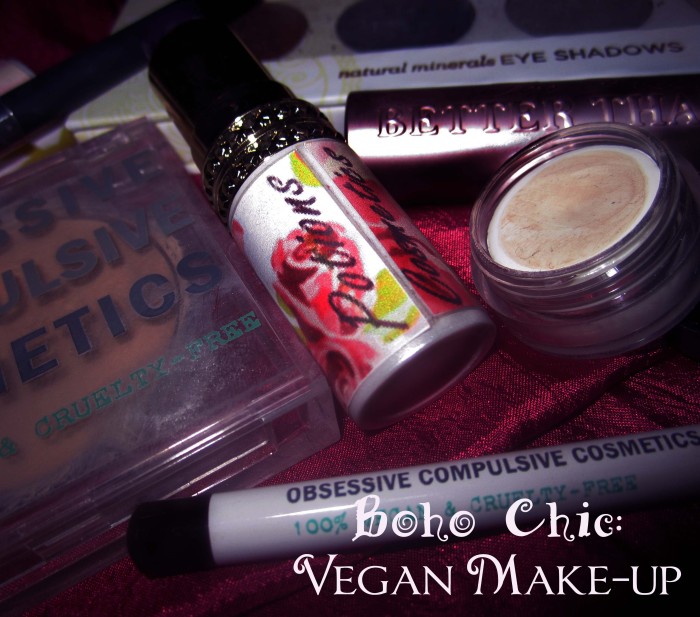
All of the products used in this tutorial can be purchased at Target, Sephora, and Etsy!
Face:
Obsessive Compulsive Cosmetics Skin: Conceal Full Coverage Foundation (My specific shade is Y1).
Etherealle Mineral Contouring Powder in HOLLOW.
Etherealle Mineral Highlighting Powder in STARK.
Etherealle Mineral Blush in ROMANCE.
*Obsessive Compulsive Cosmetics products can be purchased online or in-store at Sephora. Etherealle products can be purchased through Etsy.
Eyes:
Be Conscious Cosmetics Vegan Eye Shadow Primer
Pacifica Iridescent Palette in Gossamer Wings: I used SILVER WING (a shimmery silver shade) as my eyelid base color.
Pacifica Iridescent Palette in Gossamer Wings: I used GLOW (the lightest tone in the palette; a cream shade) as my highlight color for both my eyes and above my upper lip.
Pacifica Iridescent Palette in Gossamer Wings: I used TREASURE (an iridescent bronze shade) as my first crease color.
Pacifica Iridescent Palette in Gossamer Wings: I used BUTTERFLY (an iridescent navy blue shade) as my second crease color and as my eyeliner color.
Obsessive Compulsive Cosmetics Cosmetic Colour Pencil in SYBIL (Dark Brown)— I used this to darken and define my eyebrows.
Too Faced Better Than Sex Mascara
*Be Conscious Cosmetics products can be purchased on Etsy. Pacifica products can be purchased online or in-store at Target. Too Faced products can be purchased online or in-store at Sephora and Ulta.
Lips:
Addictive Cosmetics 100% All Natural Liner in CLEAR
Potions Cosmetics Vegan Opaque Lipstick in ENTROPY (a dark purple lipstick)
*Addictive Cosmetics products can be purchased on Etsy, and Potions Cosmetics products are also available on Etsy.
The Make-up:
Foundation:
1. Apply your foundation to your entire face, blending it onto your jawbone and slightly down onto your neck—You may use your hands, a foundation brush, or whatever your favorite foundation application tool is.
2. If you are not using a full coverage foundation, such as the Obsessive Compulsive Cosmetics Skin: Conceal Full Coverage Foundation, apply concealer as needed before you apply your foundation. Apply concealer to any areas your foundation did not cover.
Eyes:
1. Apply Be Conscious Cosmetics vegan eye shadow primer to your entire eyelid, crease, and underneath your eyebrows. I use my fingers to apply this particular primer, but feel free to use a small concealer brush to apply it as well. Applying a primer prior to applying your eye shadow colors not only makes your eye make-up long-lasting, but it can also help to brighten the colors you are using!
2. Apply SILVER WING from Pacifica’s Iridescent Palette in Gossamer Wings to your eyelid. This will be your base color.
3.Apply GLOW from Pacifica’s Iridescent Palette in Gossamer Wings underneath the eyebrow and blend it into SILVER WING.
4. Apply TREASURE from Pacifica’s Iridescent Palette in Gossamer Wings to your crease and blend it down into SILVER WING and upwards into GLOW. Also apply TREASURE onto the outer corners of your eyelid, blending inwards into SILVER WING, and outwards into a soft “v” shape. Blend away any harsh edges with GLOW.
5. Next, apply BUTTERFLY from Pacifica’s Iridescent Palette in Gossamer Wings to the outer edge of your crease, as well as the outer corner of your eyelid and blend it down and into SILVER WING and upwards into GLOW. Though you are partially applying BUTTERFLY over TREASURE, both of the shades will still be visible. The darker blue of BUTTERFLY helps to intensify and define your eyes, while TREASURE helps make your eye color pop! Be sure to blend well so that the shades melt into each other, rather than appear distinctly separated.
6. Next, apply BUTTERFLY to your upper lashline with an angled eyeliner brush. Wet the brush prior to dipping it into the eye shadow; the slightly dampened brush will make your powder eye shadow into an easily applied and well-pigmented eyeliner! Apply the liner to the edge of the eyelid and wing it out slightly.
7. Also apply BUTTERFLY to your lower lashline, from the outer corner of your eye to the middle of your eye. Use the angled eyeliner brush to apply this as well.
8. Then, using a different angled eyeliner brush, apply SILVER WING to your lower lashline and inner corner of your eye. Apply it beginning from where you left off with BUTTERFLY to your inner corner and slightly up towards your crease. Blend SILVER WING into BUTTERFLY so that they flow together seamlessly. By also adding the shimmery silver shadow to your lower lashline and inner corner of your eye, you will brighten up your eyes and really make them pop!
9. Curl your lashes and apply the Too Faced Better Than Sex mascara to your upper lashes and gently across your lower lashes. Let the first coat dry and apply 1-2 more coats, depending on how thick you would like your lashes.
10. If you have sparse, light eyebrows like I do, you can apply OCC’s SYBIL to darken and define your brows. First, apply SYBIL to a palette or the back of your hand and then apply to your brows with an eyeliner brush—this way you are not just drawing them on. This will give your brows a more natural, less cartoon-like effect. Apply the eyebrow color beginning in the middle of your eyebrow to the end of your brow and then use the remaining color to darken the front of your eyebrows.
Contouring & Blush:
1. Apply the Etherealle bronzer color (HOLLOW) to the cheekbones, temples, and your jawbone–blending downwards onto your neck and into your hairline. I use a fluffy angled brush to apply bronzer and contour my face.
2. Apply the Etherealle highlight color (STARK) to the cheeks, chin, forehead, nose, and underneath your eyes. Blend the highlight color into the bronzer. I suggest using a fluffy powder foundation brush to achieve this part of the look.
3. Next, smile and apply the Etherealle blush color (ROMANCE) to your cheeks, blending it out towards your hairline. I prefer using a kabuki blush brush to apply blush.
4. Blend the blush and bronzer with the highlight color (STARK) using the same fluffy powder foundation brush as before.
Lips:
1. Apply the Addictive Cosmetics liner in CLEAR to your lips. I prefer to fill in my entire lip with lip liner rather than just lining the outer edges of my lips as it is sometimes suggested that you do. By filling in your entire lip, you provide a base for your lip color to adhere to, which means your liner will now do more than just prevent your lips from feathering! Feel free to use a liner that corresponds in color to the specific lipstick shade you are using; I always use clear so I do not have to worry about having the correct corresponding liner shade on hand at all times.
2. After you finish applying your lip liner, apply the Potions Cosmetics lipstick in ENTROPY to your lips. I prefer to use a small “filbert” concealer brush to apply my lipstick so that I can apply it with precision!
3. To further define and highlight your lips, apply Pacifica’s GLOW above your upper lip and onto the center of your lips. Highlighting these specific areas adds the illusion of fullness to your lips!
The Hair:
One of my favorite aspects of the boho chic trend when it comes to hairstyles is the multitude of different types of braided styles that have risen in popularity. From dutch braids to french braided buns, braided hairstyles allow you to achieve a chic, unique look without having to use damaging heat to style your luscious locks!
Crown braids can be seen on celebrities, in magazines, and on fashionistas everywhere. Follow these simple steps to achieve a fishtail crown braid that will help you become a boho beauty!
Fishtail Crown Braid:
1. Begin by separating your hair into 3 sections: one on each side of your part and then your bangs. (I do not actually have bangs, so I chose a section of hair from the side of my part with more hair). If you have straight across bangs or bangs that are too short to braid, just leave them out of the style; crown braids still look great with bangs!
2. Next, fishtail braid one of the sections on either side of your part. If you wear a side part, braid the larger section of your hair first, and if you have a center part, choose either side to begin braiding. You will need to french fishtail braid your hair for this particular style, which means that you will begin with smaller sections of hair and then add to it as you continue braiding. A fishtail braid is a two-strand braid where you divide your hair into two sections and bring strands from the outside of the sections over each other to the inside of the sections. For example, take a strand of hair from the outside of the left section of hair to the inside of the right section. Then, bring a section from the outside of the right section of your hair to the inside of the left section. Continue braiding until you get to the ends of the two strands and secure the braid with a small elastic.
3. After you finish braiding the first section of your hair, take the braid and secure it across your head, making sure to keep it behind each of your ears. Place bobby pins at the end of the braid; by pinning the end of the braid, you are able to remove the hair elastic you placed there earlier so that you do not have to worry about that being visible in your finished style. 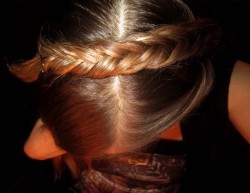 After securing the first fishtail braided section of your hair, the remaining 2 sections of your hair should look something like this:
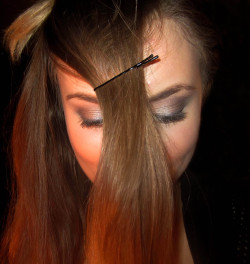
4. Next, you will french fishtail braid the section of hair to the other side of your part in the same manner as you did the first section.
5. Once you are done braiding this section, wrap the braid over the ends of the first braid (this will cover up any sections of hair that were too small for you to braid) and in front of the first braid, and secure it behind (or as far to the other side as your length of hair will allow) your other ear. Remove the hair elastic after you pin the second braid securely enough, but make sure to do so before you pin the ends underneath the first braid, otherwise you will not be able to remove the hair elastic. Place pins at the end of the braid and anywhere any loose hairs are visible. This look can definitely be slightly messy, so do not worry about any frizz or loose hairs–it will just add to the easy-going, boho vibe of this look! Your fishtail crown braid should look something like this after you have completed this step: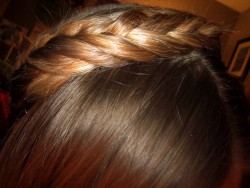

6. If you have bangs that you are not able to braid, then your fishtail crown braid is now complete! If you still have 1 remaining section of hair (like me!), you will now french fishtail braid this section of hair as well. Braid it in the same manner as you did the other 2 sections of your hair and secure the end with a small hair elastic until you are done pinning it.
7. Once you have finished braiding the remaining section of your hair, you are ready to secure it across the other two braids and complete your fishtail crown braid! To secure this braided section of your hair, you will wrap it over your other braids (making sure to stay above and behind your ears) and pin it on the back of your head, tucking the ends underneath the other two braids. Remove the hair elastic before tucking the ends of hair underneath the other braids. The placement of this third and final braid will depend upon the length of your hair, so don’t worry if it doesn’t look exactly like my finished style does! Here is the completed fishtail crown braid: 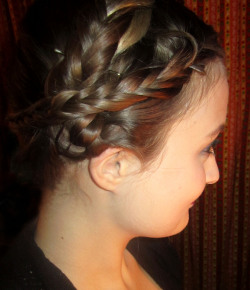
Now you’re ready to be a vegan boho beauty!
More vegan makeup tutorials: Office-Ready Makeup Tips and Tutorial
__
Photo: Becky Curl

