There can never be enough ways to relieve the tension in our back, chest, and shoulders. Bad posture and rounding forward in our shoulders for work and daily life has become the norm. Our chest and shoulder muscles have shortened and tightened while our spines have become misaligned. For me, having an extra ten pounds around my waist from being pregnant has put a lot of stress on my back, causing me chronic pain. Using the yoga blocks to help open up my chest, back, and shoulders has saved me. The yoga blocks allow you to get deeper into the stretch than you would on your own. They also offer excellent support for the body so that stretches and poses can be held for longer periods. Whether you are suffering from back pain, bad posture, or just want to become more flexible, these there sequences are perfect for you. Try to hold each stretch for 1 minute, working your way up to 2-3 minutes each.
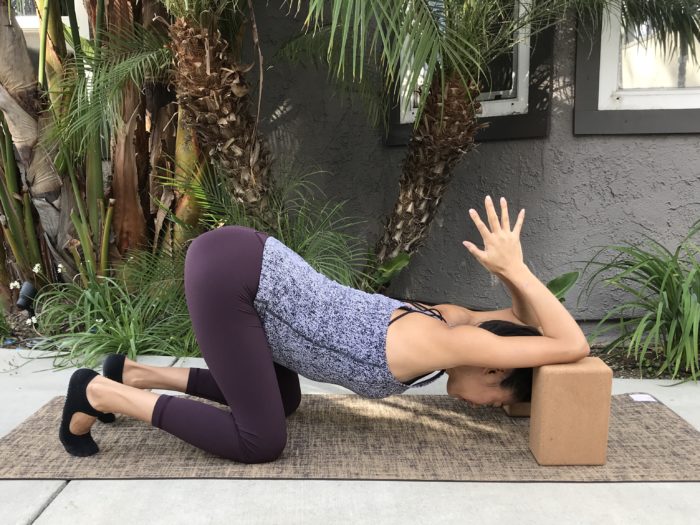
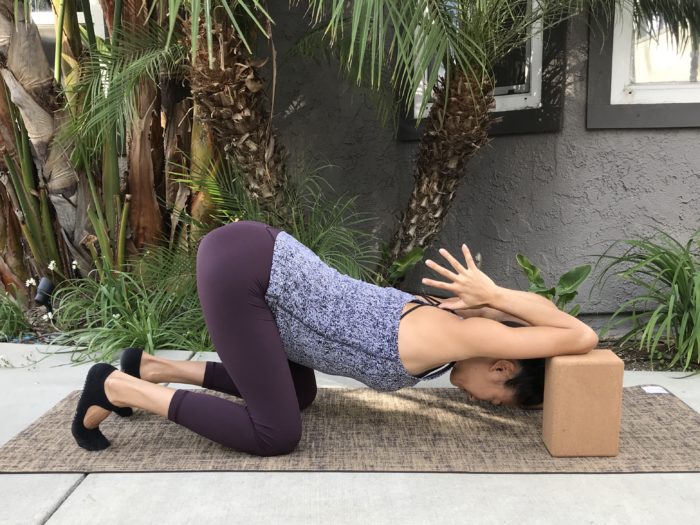
1. Upper Back, Shoulders, and Triceps: Place the yoga blocks on the floor at their highest position shoulder width apart. Kneel down and put your elbows on the top of the blocks. As you keep your hips in the air, start to melt your heart towards the ground. You can put your hands together with your fingers pointing straight up or for a deeper stretch, bring your hands back, touching your thumbs in between your shoulder blades. Allow your head to hang heavy, placing your forehead on the ground if you are flexible enough.
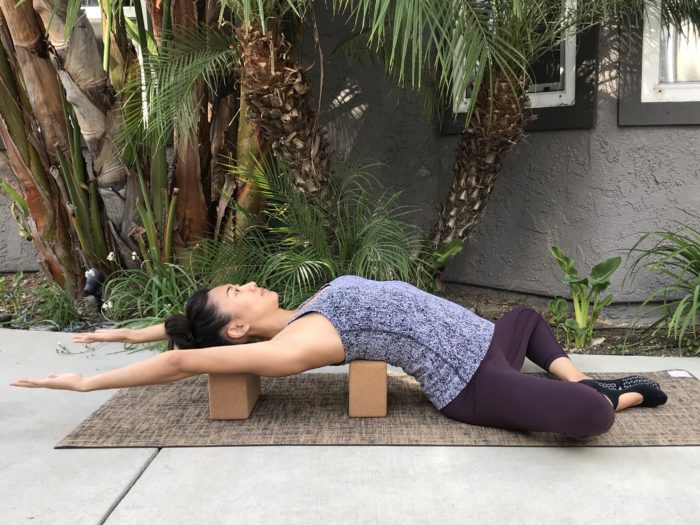
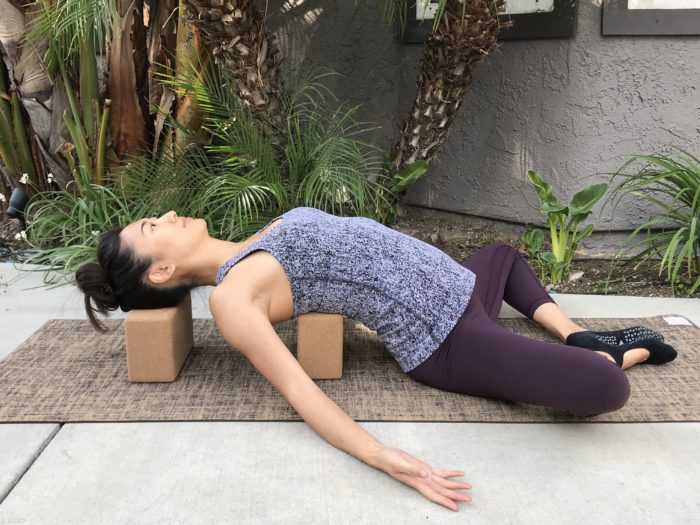 2. Middle Back and Chest: Place one block at the middle height horizontally on the floor. Place the other block at the same height and position about a foot away. Sit in a butterfly position with the soles of your feet together and the yoga blocks behind you. Carefully lean back so that the first block is going across your middle back area right about where your bra strap line is. The second block should be under your head for support. Make adjustments as needed. You should be able to completely relax in this pose without pain from the blocks. Allow your arms to hang naturally by your sides on the ground. For a deeper chest stretch, do slow arm circles lifting your arms up above your head. As you bring your arms back around, keep your palms facing up. Repeat as many times as you like and rest with your arms by your side with your palms up.
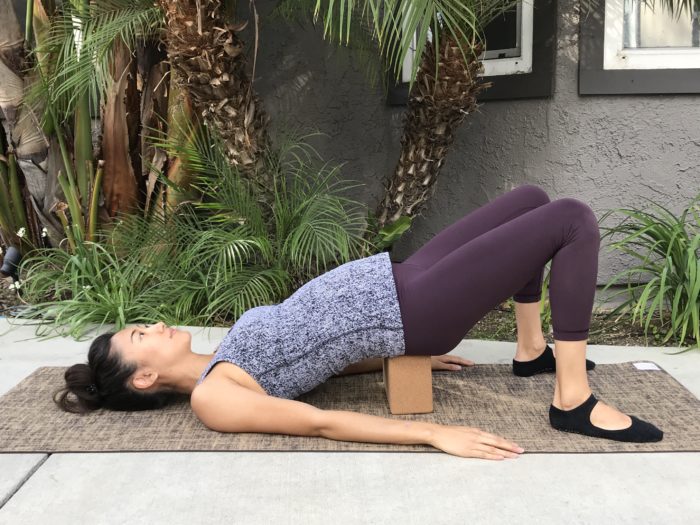
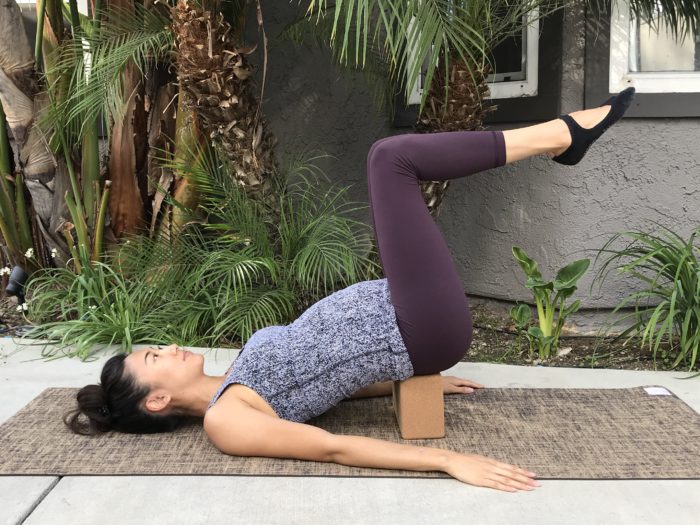 3. Lower Back: Start lying down on the floor with your legs bent. You will get into a supported bridge pose by lifting your hips into the air and sliding a block underneath your sacrum. The height of the block will depend on your own personal needs and flexibility. The higher the block, the more decompression you will get in your spine so work your way up to higher levels slowly. Once you are comfortably in your supported bridge pose with the block underneath you, lift your feet off the ground by bringing your knees over your hips. Keep your legs at a relaxed tabletop position allowing the weight of your legs to be supported by the block. Remember to breathe naturally and slowly in each pose, allowing your body to relax and release.
Say goodbye to your back pain with these tension-releasing postures!
Have you tried yoga blocks to open your upper body?
Also by Crystal: 4 Tension-Busting Hip Flexor Stretches You Need In Your Life
Relieve Pain From Sitting All Day With These Sacrum Release Stretches
Related: 5 Yoga Stretches to Relieve Tight Calves and Shins
Get more like this—Subscribe to our daily inspirational newsletter for exclusive content!
__
Photo: Crystal Chin
